My nails always reflect the time of year and Christmas time is no exception- it's no secret that I love a festive nail throughout December. In fact, there has been nothing but Christmas-themed colours and styles on my nails the past few weeks. Today I bring you the Christmas Nail Edit: Five Ways.
1. The Candy Cane
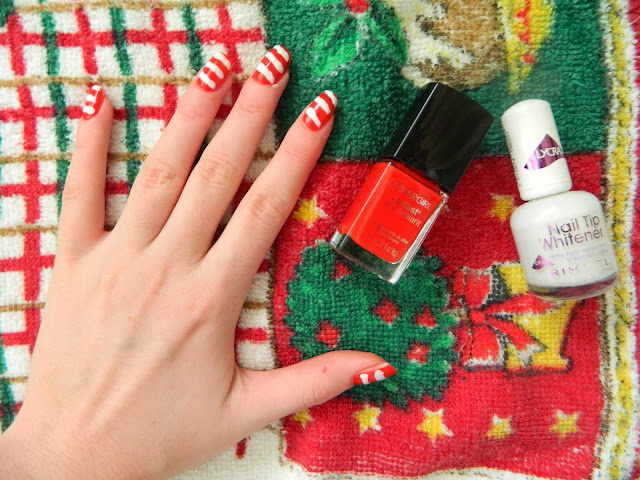
If I'm honest with myself, I am a complete novice when it comes to nail art. Graced with somewhat shaky hands, impatience, and the artistic ability of a crocodile, I find it overly tedious and I always tend to ruin it on the first nail. I often give up after the sweat begins to form on my brow, I'm red in the face, and I'm swearing at myself in disgust, but I find this style to be not as nail-bitingly terrifying as some nail art ideas out there. Start with the usual prep business (outlined here in my manicure regime post), apply a few coats of any red polish you have- mine's the Covergirl Outlast Stay Brilliant Nail Gloss in Ever Reddy- and wait to dry. Next grab any possible nail tool lying around: a bobby pin, nail art brush, eyeliner brush, or whatever is handy at the time. Dip into your choice of white polish- the Rimmel Nail Tip Whitener works for me- and get painting in diagonal lines across the nail to give the trademark candy cane look. You could spruce it up with varying thicknesses and even throw in a few green strokes, but my nail art skills aren't ready for that just yet!
2. Let it Snow, Let it Snow, Let it Snow
The thought of snow isn't a realistic one for an Australian girl such as myself, however, the nails are a great place to display your inner white Christmas enthusiast. This design is super simple but gives a snowfall effect perfect for the festive season. You could start off with any base colour you like, but I chose blue to make it as authentic as possible. Grabbing any silver or white glitter polish, start by applying this to the very tips of your nails. In layers, gradually work your way closer to the nail bed to create an ombre glitter effect. This will mimic snow falling. Finish with your top coat of choice and voila!- simple nails this Christmas. Though, good luck getting the glitter polish off ;)
3. The Metallic Foil Nail
I find that metallic nails aren't always appropriate year round, but Christmas festivities call for an in-your-face metallic shade. I particularly love the look of a silver nail in the lead up to Christmas, and this is easy-peasy-lemon-squeezy to do. Just apply your metallic nail polish of choice and it instantly looks like you have put in a lot of effort to get Christmas-ready talons.
4. The Glitter Accent
I love a glitter accent nail all twelve months of the year, but it just seems so perfect during December. There's something about gold glitter slicked over your favourite shade that just seems so effortless chic. Paired with a deep burgundy, this combo screams Christmas and is perhaps my favourite look from the bunch. I just can't get enough- I'm sensing that this one will be popping up throughout the cooler months next year for sure.
5. Razzmatazz
This is the ultimate Christmas nail. A bright red infused with shimmer is just about as Christmassy as you can get without wearing a Santa suit and handing out presents from your sack to every boy and girl in the world. I'm donning the Ulta3 Nail Colour in English Rose which retail for only $2 in Australia- and absolute bargain! My bottle is looking a little well-loved as I crack this gem open each Christmas. I'm thinking this one might be the Christmas Day polish for 2013. Stunner.
So there you have it, folks, my festive nail guide. Now which one to pick? Eeny, meeny, miney, mo...


No comments:
Post a Comment